Are you tired of boring attack tools? The same old’ cookie cutter corpo-slop software that doesn’t really get you as a hacker? Well ladies and gentlemen, furries and moots, presenting the Miku Miku Beam network stressor tool to spice up your life ✨

Intro
If you’re not familiar, network stressors are toolsets that specialize in stress-testing networks and things on networks; basically just trying to find the limits where things start breaking. Specifically within this category are DDoS tools- Distributed Denial of Service. These tools specialize in using large amounts of devices at different locations (hence the ‘distributed’) to attack a target. The method for these attacks can vary, but for the most part it involves sending copious amounts of traffic to overwhelm the network, servers, or client (the ‘denial of service’ part).
Miku Miku Beam is one such tool. It joins the ranks of tools I would categorize as actually fun to use. It does one thing, does it well, has code that doesn’t look like it was written by a monkey, and a lovingly crafted meme interface. Firing up this thing reminds me of the good ole’ days using Low Orbit Ion Cannon.
Installation
If you don’t already have it, you’ll need Git and node installed locally (I recommend nvm).
First, clone the repository and open up a terminal. Run npm i to install all the dependencies, then npm run dev to start the development server.
After a moment, the frontend and backend should spin up, and you can go to http://localhost:5173 to see the interface.

Setup
Quick disclaimer, do not use this tool to attack anything you don’t have permission to, don’t break the law, don’t be a bad guy, IANAL, etc.
Once the tool is running, you’ll need to give it some ammunition. This comes primarily in the form of proxies: Miku uses service workers that send requests to the proxies, which then proxy the request ultimately to the target. The more proxies you give it to work with, the faster she can spew packets.
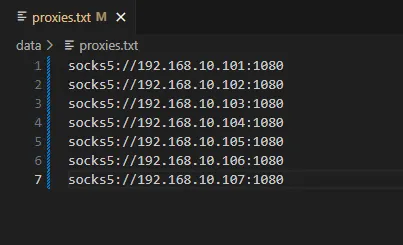
First, you need to get some bitches proxies. Open up the data/proxies.txt file (or click the ‘scroll’ icon on the top right). The default SOCKS4 IP addresses you see here most likely won’t work, they tend to rotate through them constantly. You’ll need to source your own proxies, there’s a bunch of sus free ones on the internet if you’re into that sort of thing. Miku Miku Beam supports SOCKS4, SOCKS5, and http/https proxies.
To test this bad girl out, I didn’t want to blast it at some pour soul on the internet, I wanted to do something internally; both so I wouldn’t be breaking any laws and could more tightly control and assess the attacks. To do so, I setup the following infrastructure locally:
- SOCKS5 proxies x 7 (via ServerProxy docker images)
- Minecraft Game Server (binhex docker image)
- OpenCanary Web Server (docker)
- Nginx Proxy Manager (docker)
- Adguard DNS (docker)
- Miku Miku Beam (running on dev PC)
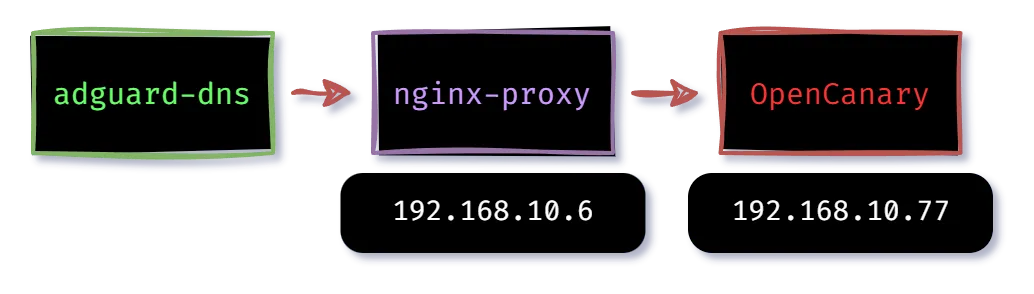
The rough network diagram:
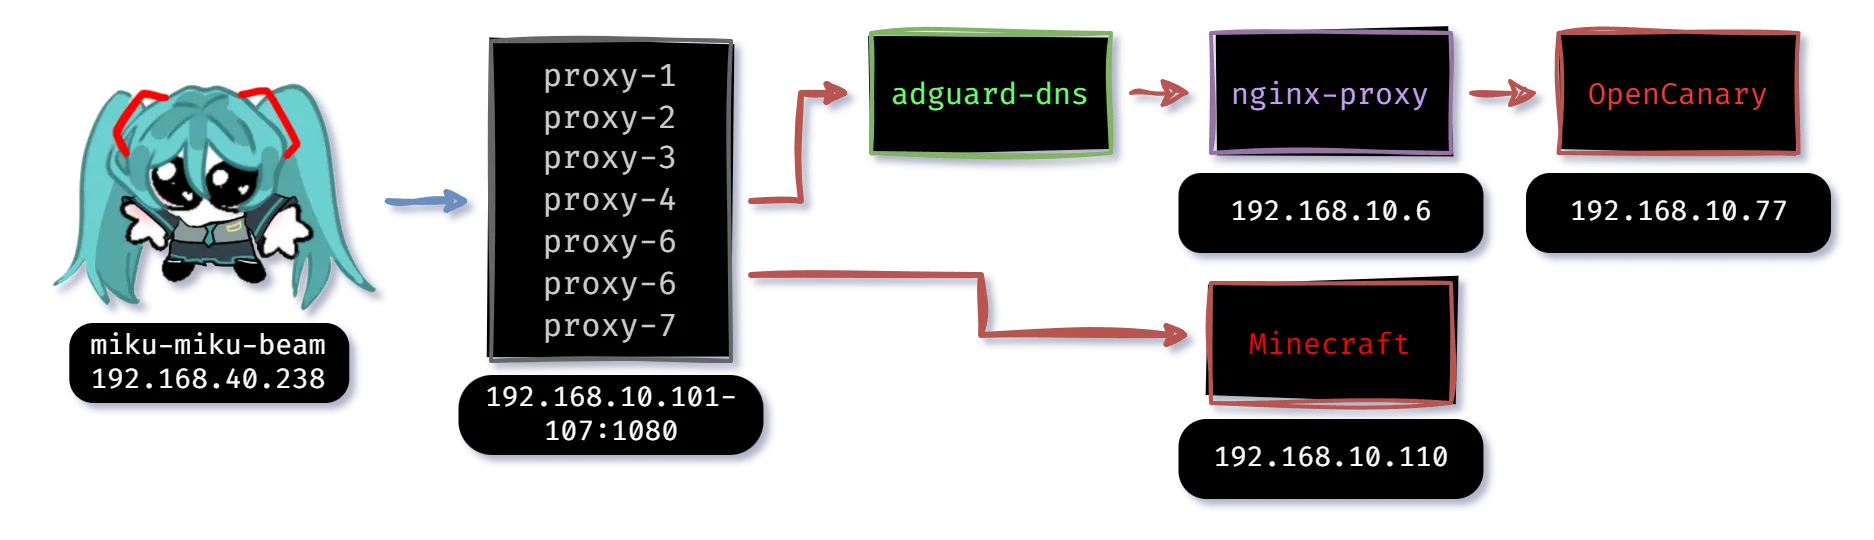
Basically we have two scenarios, one where Miku will be HTTP flooding a website that has a DNS redirect to a reverse proxy in front of it, and one where there is a simple Minecraft server running that it will TCP flood.
The first scenario is more realistic, since it incorporates multiple spots where the network can possibly fail:
- at the DNS redirect (adguard)
- at the reverse proxy (nginx)
- at the web server (OpenCanary)
But I’m personally interested in the second scenario because Miku has a Minecraft server attack built in that could prove interesting.
(Note that none of this is that realistic, because much of the virtualized infrastructure is running on the same host, so the network latency between the proxies and the target is unrealistically low and also bypasses the switch and router in this setup)
Attack Scenario 1
After setting everything up and configuring the VLAN rules correctly, we press “Start Miku Beam”.
man I love that too much
As we hit attack, Miku starts sending thousands of requests to our proxy servers, which in then turn resolve the request. In the first scenario, the machine sending the request resolves the DNS request first with our DNS server, and then sends the request to the proxy.
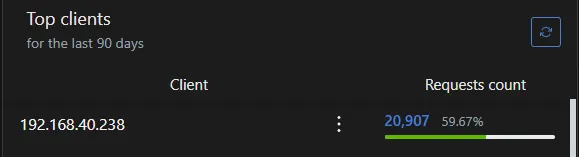
As you can see, over the course of this testing we made A LOT of DNS requests to the server. This is in theory, one part that could break or be overwhelmed with traffic if the domain had to be resolved for every request.
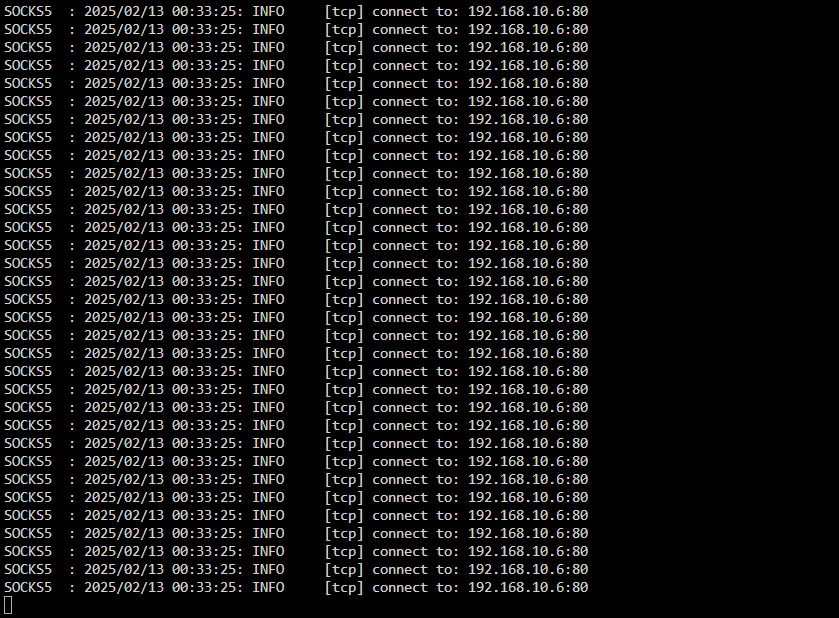
Here’s what the logs on one of the proxy server looks like:
And if we look in more detail, we can see the myriad of source ports opening on our machine:
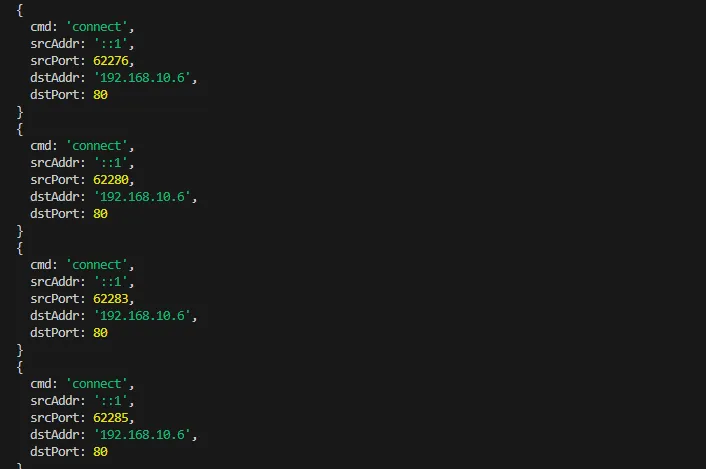
Next, the resolved IP points to a reverse proxy, nginx, which proxies that request based on the domain/subdomain used in the request. This is a typical setup for making things publicly accessible outside the network without punching a bunch of holes in the firewall.
In my configuration the web server we’re attacking (OpenCanary) won’t be able to tell who the originating request is, because it will all appear to be coming from the 192.168.10.6 address (nginx). Nginx will know, and if we set this up differently the web server could also have insight to that information.
Aftermath
Ultimately the biggest flood I could get out in this scenario over 60 seconds was 35,902 packets sent at a 1ms delay:
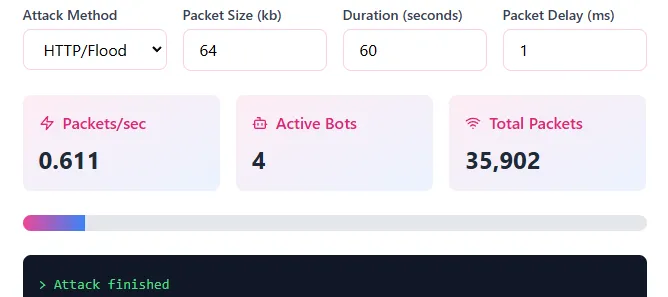
The flood didn’t cause any sort of slowdown to the web server, nor the DNS or nginx reverse proxy. Everything remained completely g2g during the full duration.
Which comes at no surprise, modern web and networking tech serving basically static HTML files is really efficient, one machine attacking even with 7 proxies wasn’t going to hurt it. I’d estimate to cause a slowdown or crash with a flood, we’d need 20-30x more connections on this architecture. Our virtual CPU peaked at about 10.6% during this flood, it had quite a bit of headroom left.
See if you can beat this high score, then brag about it on 𝕏.
Attack Scenario 2
For the second attack scenario, I setup a MinecraftJavaEdition server and ran the Minecraft client on the same dev box as the Miku beam.
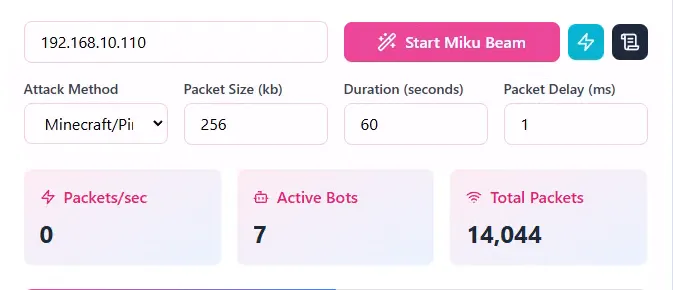
In Miku, I selected the “MinecraftPing” attack (which I think is just a TCP flood on port 2456, the one used by Minecraft connections) Here’s the settings I used when doing this attack:
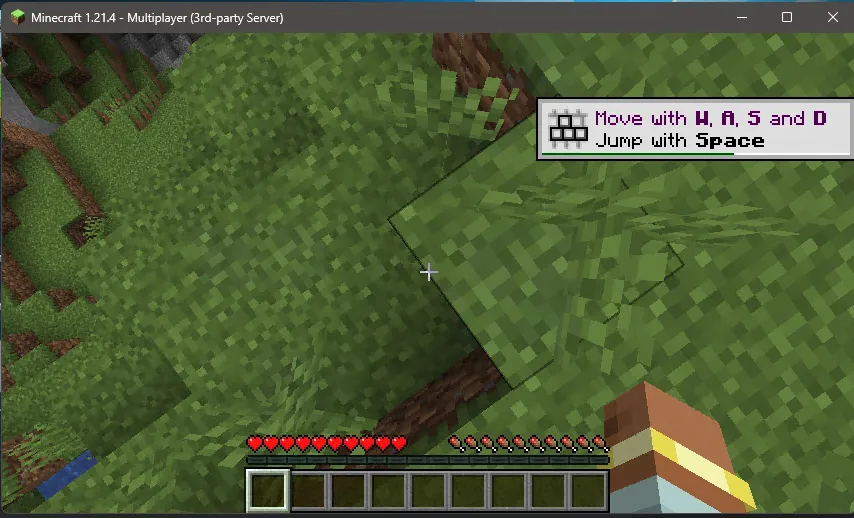
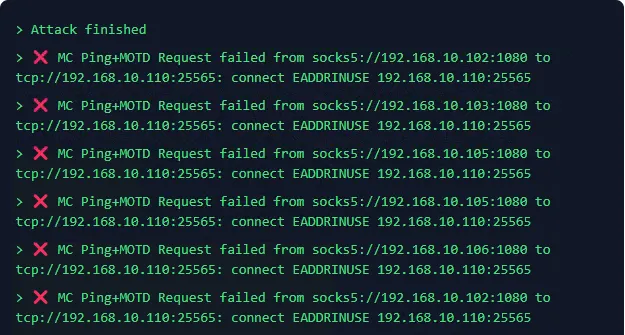
In-game I connected to the server, then hit fire on the Miku Miku beam. At first, the server seemed to be holding fine as the packets sent increased. Then I saw eventually this error occurring in the Miku logs:
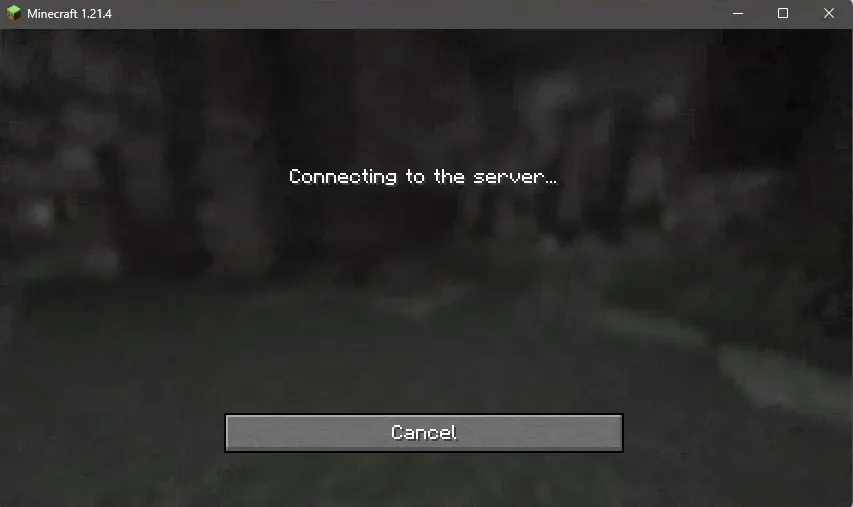
At the same time, I was suddenly disconnected from the server, and so I tried to reconnect:
And we got the error we were looking for!
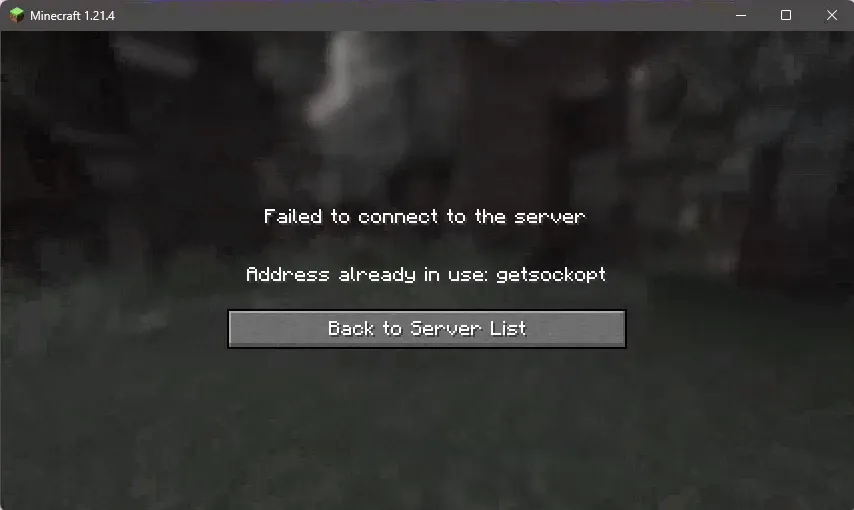
Checking the minecraft server logs, we don’t see the bogus TCP floods but we do see the disconnection string that kicked us off:

So it seems if you want to flood a minecraft server, you’re waiting for that TCP connection rejection log to occur, and then you know you’ve saturated the connections it can accept. This seems to be possible with (relatively) not a whole lot of requests, at least compared to what you’d have to do to a web server.
Review
Overall Miku Miku Beam is a blast (hah) to use. I like the dual server/ui setup, the fun interface, and the simple nodejs code. I’ll definitely have this on the list as one to contribute more attack types in the future, and I hope it continues to grow as a network stressor toolset. Shoutout to @sammwyy for creating it and open-sourcing it, go give them a follow!